
At Home Facial
By week three of quarantine, I noticed my skin was looking a little worse for the wear. I had tons of blackheads, little bumps along my forehead and gigantic pores.
It's funny – they always say if you don't wear makeup, your skin should be so much better.
I guess the combination of working out (and sweating) more, eating lots of junk food and neglecting my skincare routine was taking a toll.
So I started taking a day out of the week to give myself an at home facial and now, it's week 6 of quarantine and my skin is looking glowy, even and clean!
Here are my tips to perfect an at home facial. It's easy, relatively inexpensive and a great way to relax!
ADVERTISEMENT
How to Give Yourself a Facial at Home
For an at home facial, I usually commit to about an hour and go through a couple steps:
- Cleanse
- Face Shaving
- Steam + Extractions
- Mask or Treatment
- Facial Massage
You can do more or less.. I just find it helps to do them all when I'm already in the mood to dedicate some time to taking care of my skin.
Keep reading or save this article to read later by pinning it ⇟

ADVERTISEMENT
1. Cleanse
Start with clean skin. Since we're doing a lot, I like to use an extra gentle cleanser like this Korres Yogurt Cleanser. It's made with probiotics and has a creamy texture that deep cleans without that stripping feeling.
If you're wearing makeup, make sure to double cleanse. You want to start with a nice clean base. This balm cleanser from Farmacy is a great clean option.

ADVERTISEMENT

2. Shave Your Face
This is optional… but ever since I started shaving my face I can't go back. I'm not a really hairy person but everyone has a little bit of peach fuzz on their face.
Try giving it a go once and you'll see what I mean – it removes the outer layer of dead skin and leaves your face so smooth and even. The day after I shave, my face is always glowing!
I have this set of facial razors, which includes 30 razors in a handy case. These have longer blades than the traditional Japanese eyebrow razors, making it easier to tackle the face.
Some people dry shave but personally I recommend putting shaving cream on, just for extra lubrication. Then I start with the left cheek, and go all around the face in a counter clockwise motion.
I avoid the nose and am extra careful around my eyebrows.
ADVERTISEMENT
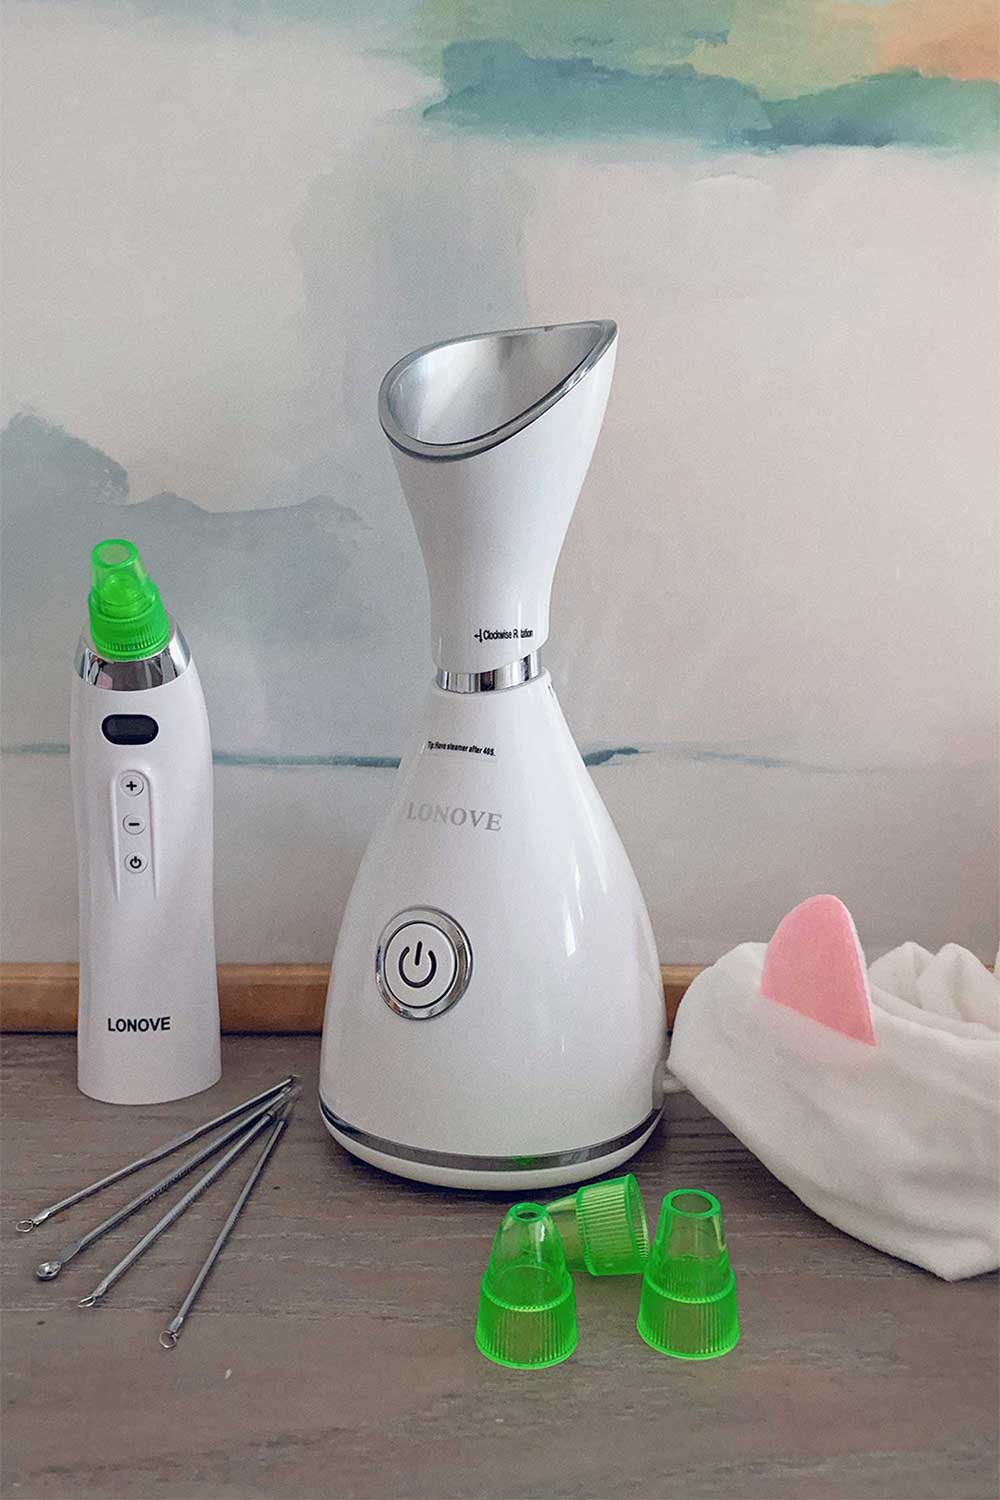
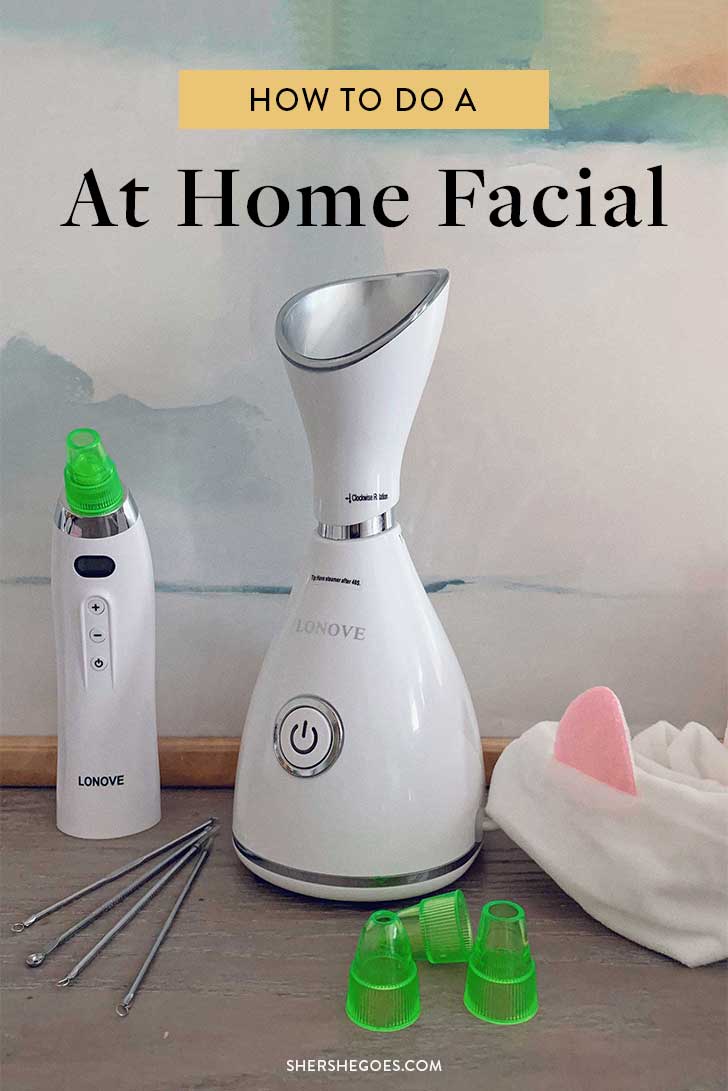
3. Steam
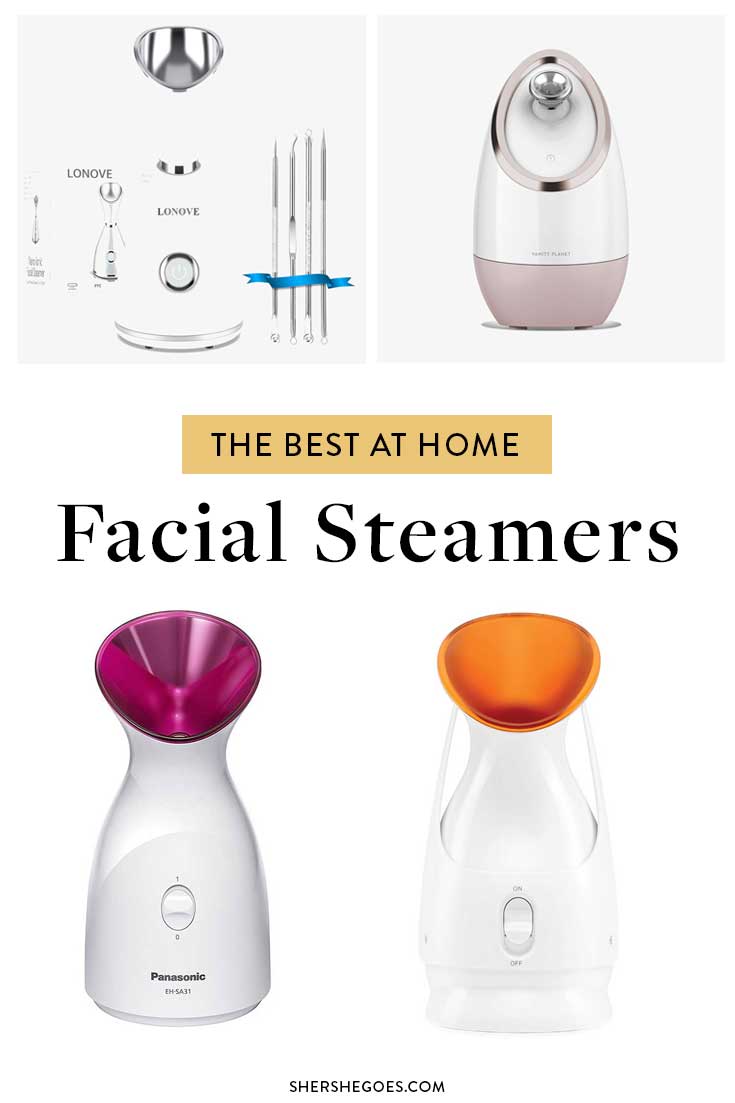
Now for the relaxing step! If there's one tool you need, it's a facial steamer.
These things feel amazing on your skin and aren't expensive. I use this tiny, sleek steamer I got off Amazon on my face for about about 5 minutes.
It's great because it heats up really fast.. maybe within seconds of pouring in water. I recommend using distilled water if you have it. Or you can boil your tap water if you get clean tap.
ADVERTISEMENT
I usually steam my whole face, then move a little closer (but not too close) and spend a little longer steaming my cheeks, nose and forehead.
The steamer I have came with an extraction kit, so I use the tools to remove any blackheads. It also included a headband, which is convenient to get all your hair out of your face. For the price, the steamer is really such a good value.
I tend to get really oily around my nose so I also got this blackhead remover, again off Amazon. It's essentially a vacuum suction for your nose and has interchangeable heads. I use it on the lowest setting because it's quite powerful, and the blackhead remover helps with those stubborn extractions.
Afterwards, my nose is usually quite red, and sometimes the skin is a little rough if I've done a lot of extractions. I think that's normal though, as my nose will look the same at the spa.
ADVERTISEMENT

4. Mask
Now that your skin is baby smooth and entirely clean, it's time for a mask!
If you need an intense mask for immediate results, try out the Drunk Elephant Babyfacial. It's a 10 minute wash off mask of concentrated AHAs + BHAs to resurface the skin.
If you have sensitive skin or prefer clean beauty products, the Korres Pomegranate Resurfacing Mask is a great option. It has all three exfoliant types: AHAs, BHAs and enzymes to unclog your pores and slough off those dead skin cells. I love the smell of the pomegranate and it's gentle enough to use on a weekly basis!
And finally, if you use retinols on a weekly basis and want to focus on hydration instead, you can opt for a standard sheet mask or modeling mask. I like the Dr. Jart shake & Shot masks, where you mix two packets into a fun cup and shake together to create a cooling, rubbery mask. It gives you that high end spa like experience ha!
ADVERTISEMENT

After the mask treatment, I'll typically wash my face with water and go through my night time skin care routine.
I'm currently using the Fresh rose toner and Fresh Kombucha essence and PCA hyaluronic serum.
Usually I'd incorporate either this 0.5% retinol or the PCA peeling gel, but since it's “spa night” and I'll be touching my face a lot for the facial massage (next step), I just finish with my favorite PCA moisturizer and the Laneige lip mask.
ADVERTISEMENT

5. Gua Sha
Facial massage, or the Chinese practice of gua sha, is something I started relatively recently. It essentially calls for massaging your face (either with your hands or a tool like this one) to relieve inflammation in your lymph nodes.
If you're prone to puffiness, gua sha helps to slim your face of the extra fluids. My face doesn't necessarily bloat easily, but even I notice a difference the next day!
I have a couple of these gua sha tools that I use. You can also use a (faux) jade roller, an ice roller if you like a cooling sensation, or this Refa if you're extra fancy.
ADVERTISEMENT
But honestly even your hands will work! For your first time, try facial rolling with your hands by making a peace sign and then curling your two fingers (index + third) into bunny ears for the “grips”.
Spending 10-15 minutes to massage your face is really relaxing.
Apply a hydrating cream or facial oil first so you have some slip and hydration, otherwise you'll be pulling and tugging too hard on your skin.
I love the Dr. Brandt sculpting neck cream, which has this nice cooling effect and feels in-between a gel and cream texture. It also comes with a gua sha tool, which is nice!
Sometimes I'll use the Drunk Elephant Marula Oil instead, which is the only facial oil that I've liked. It's incredibly moisturizing without being greasy.
Then start at your neck, work your way up to the jaw, then cheeks, eyes and forehead. The key thing to remember is you always want to massage away from your face to de puff.
This video does a great job walking you through the motions.
ADVERTISEMENT
And that's it! How do you take care of your skin?
Follow me on
![]()
