Aerogarden Farm
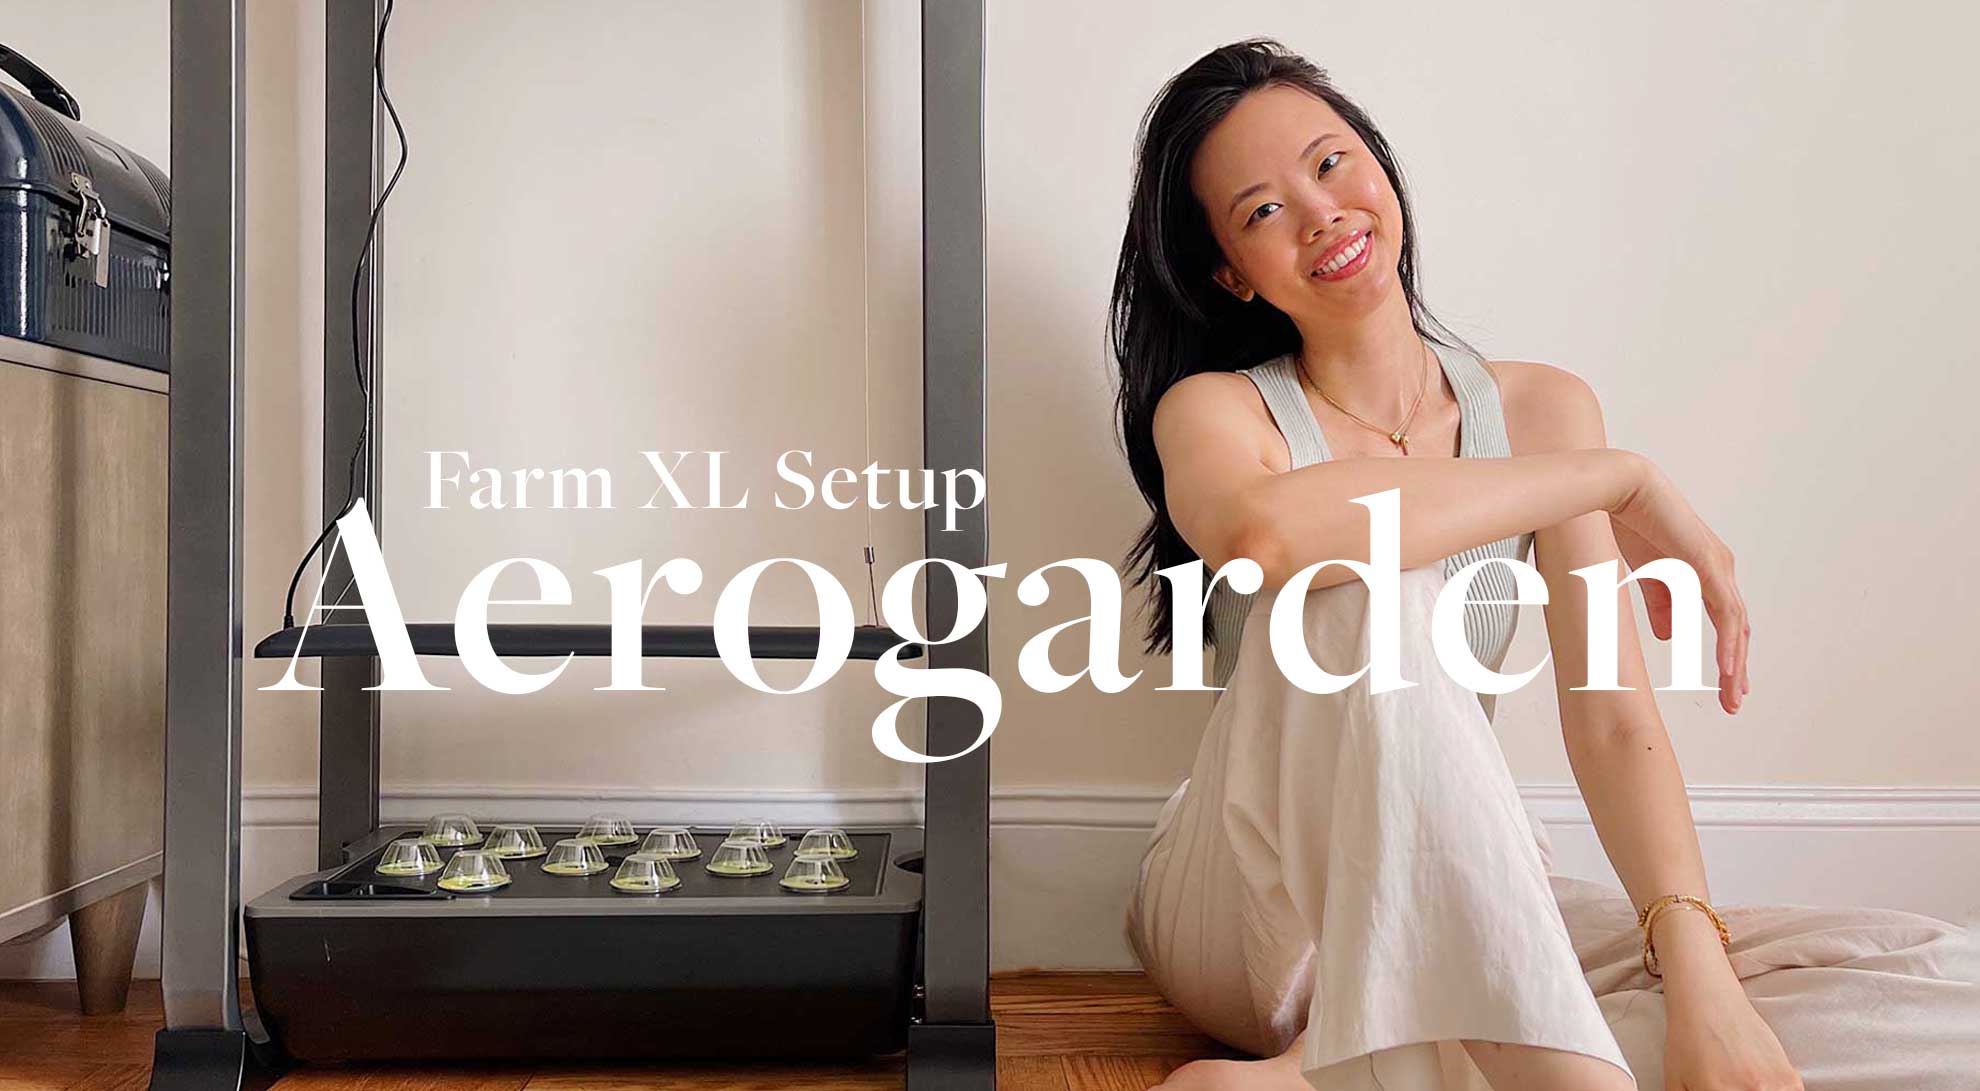
I recently upgraded to the Aerogarden Farm XL and I’m really excited about being able to grow larger veggies!
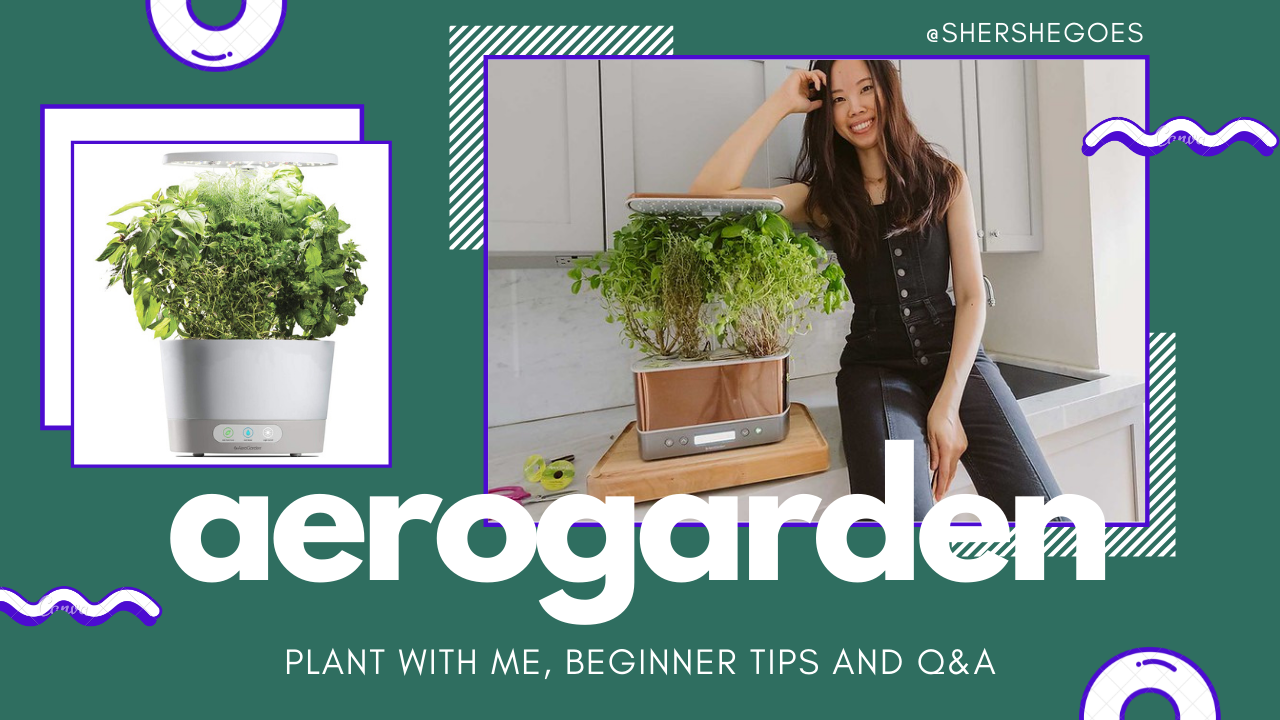
I started with the Aerogarden Harvest about 18 months ago, and quickly got obsessed with hydroponics. Growing my own herbs was not only satisfying but rewarding… I always thought I had two black thumbs!
So I thought it was time to try something a little bigger and more advanced.
My goal with the Farm XL is to grow cherry tomatoes and hot peppers, so today’s post is all about how to set up the Farm 12 XL model!
ADVERTISEMENT
Assembling the Farm 12XL
I thought it would be easy to assemble (because the countertop Aerogardens were straight forward)… but I ran into well, a lot, of trouble ha.
Probably because I was attempting to do it alone and let’s just say I’m not the handiest person in the world.
But eventually figured it out and I thought I’d share some tips + tricks so that the Farm set up process would be easier for anyone else trying to put it together!
Here’s exactly how to set up the Aerogarden Farm so you can grow your own veggies, in no time.
Aerogarden Frequently Asked Questions
I also did a livestream on Amazon Live sharing my top tips for the Aerogarden!
I explained the difference between all the Aerogarden models, gave an update on my hot peppers and answered lots of FAQs! You can watch a recap of the video here.
Make sure to follow my Amazon shop page to join future livestreams!
Keep reading or pin this article to save it for later ⇟
ADVERTISEMENT
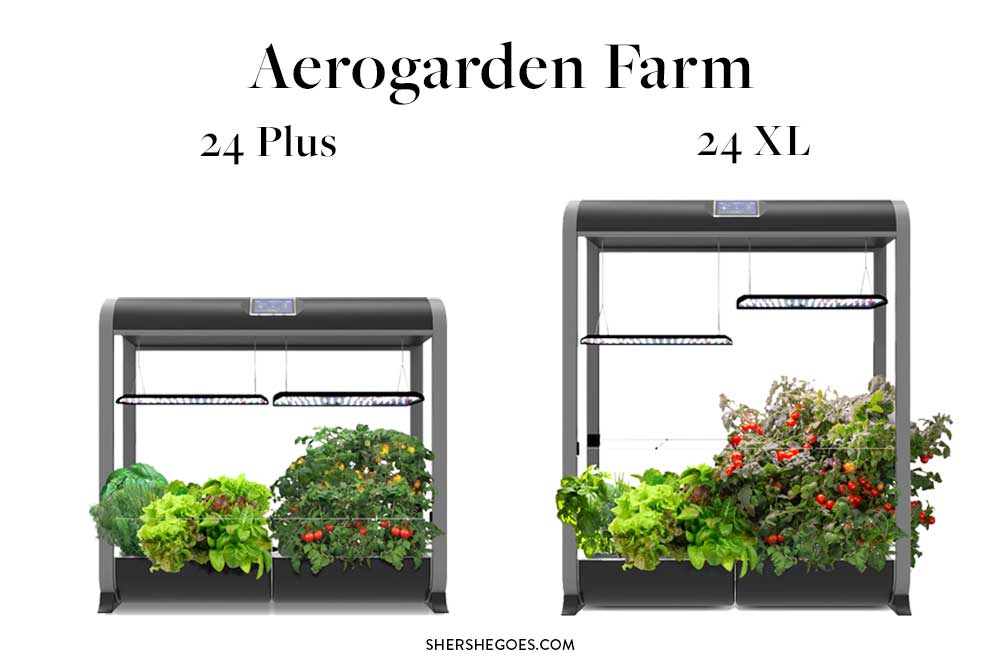
Aerogarden Farm vs Farm XL
Aerogardens are available to buy directly on their website, as well as on Amazon, Walmart, Best Buy and Macy’s.
The first question to ask yourself is… which farm model to buy!
Aerogarden has a couple different options in the Farm family of hydroponic models. It boils down to whether you want the Farm Plus or the Farm XL.
I puzzled over the website trying to compare all the options and the main difference is in the max height of the machines. The Farm XL models have a maximum height of 36″ while the regular Farm Plus models have a maximum height of 24″.
(For comparison, my Harvest model had a max height of 12″)
So, does height matter?
ADVERTISEMENT
For Aerogarden units… personally I think so!
The extra 12 inches make a big difference if you plan to grow larger items in the machine.
In my own experience, my herbs in the Harvest easily reached the top of the machine, and they grew quite quickly. Having to constantly prune the plants when they’re full grown can be a lot.
I think having more vertical growing height will allow your plants to produce more and also make it easier for you to manage the plants.
So personally, I think the XL farm models are worth investing in over the regular farm models.
ADVERTISEMENT
Aerogarden Farm 12 XL
The other thing to consider is whether you want to pick up the Farm 12, or the Farm 24. The number refers to the number of pods that the unit can hold.
Both models are large enough that you’ll likely place them on the floor. They’re a bit too large for your average kitchen countertop (but potentially could fit and look great on a grand kitchen island?).
I think the Farm family is the perfect size for apartments and condos!
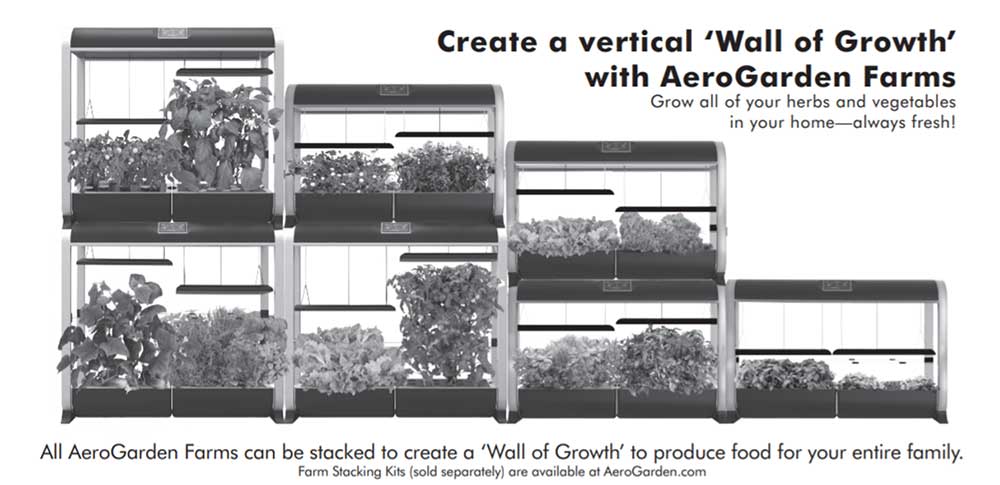
The best part is the entire system is modular. If you get obsessed with hydroponics, you can buy multiple Farm units and stack them together to create a cool wall of gardens.
I know you can DIY your own hydroponic setups, but I love how sleek, aesthetically pleasing and functional the Aerogarden units are.
And of course, the best part is indoor hydroponics allows you to grow all year round.
ADVERTISEMENT
Ease of Use
Usually with tomatoes, especially in the Northeast USA, you have to start seedlings indoors and really count down your days to make the most of the short summer growing season.
With the Aerogarden units, you can start any time of year.
It’s a fully-contained, mess-free (no soil) system that essentially runs on auto pilot. So even without gardening skills, you’ll be able to grow vegetables, salad greens, herbs or flowers 5x faster than in soil outside.
Ok, enough gushing about the Aerogarden units.
Here’s how to set up the Aerogarden Farm!
(By the way, these instructions are virtually the same for both the 12, 24 and XL models)
ADVERTISEMENT
How to Setup the Aerogarden Farm
I have written assembly tips below, but if you prefer to see things visually I also recorded an unboxing video as I set up the Farm XL. Watch the setup video on Youtube here.

ADVERTISEMENT
What’s Included With the Aerogarden Farm
Monitor
All the Farm models have a touch screen monitor that tells you what’s going on. The screen displays the light schedule, water level status and reminds you when to top up with plant food.
Even the light movement is motorized and can be controlled from the screen!
ADVERTISEMENT
Grow Bowl
Each Farm grow bowl holds ~1 gallon of water.
So the 12 unit Farm will hold about 1 gallon while the 24 unit Farm has two grow bowls and will hold ~2 gallons.
The water pump is also very quiet. Occasionally, you might hear the trickling of water, but otherwise there’s no noise.
ADVERTISEMENT
Lighting
The Farm units have a 60W LED grow light panel.
With the Farm 12 XL, there’s just one LED grow light, whereas with the Farm 24 XL there are 2 separate LED grow lights.
Independently controlling each LED grow light comes in handy, as it allows you to ‘succession plant’ and start seedlings at different intervals. It’s also great if you plan to grow different types of veggies that have different heights.
ADVERTISEMENT
Dimming the Grow Lights
One new feature that Aerogarden added is the ability to control the light output.
You can actually dim the grow lights if they’re too bright for you. And, you can even use the sunrise and sunset dimming feature if you want to gradually wake up and put your plants to bed!
How cute right?
ADVERTISEMENT
Utility Bills
I’ve gotten a couple questions about the electric bill.
I didn’t notice a meaningful change in my utility bill with the Harvest model, and I don’t think there will be much of an increase with the Farm either. Since these run on LEDs, they’re very efficient and cost effective.
ADVERTISEMENT
WiFi + Mobile App
A nice new feature with the Farm models is their ability to sync to your home WiFi network.
You can download the Aerogarden app on your phone, and monitor the progress of your plants from afar.
You can even control the lights, take photos of your seedlings, or set the unit to vacation mode all from the app.
ADVERTISEMENT
Seed Pods
Each Farm model comes with seed pods included. There’s the choice between an herbs and salad greens kit as well as a cherry tomato kit, so you can have fun experimenting and plant both!
You can also separately purchase custom seed pod kits (where you select each seed yourself) or the combo cherry tomato and pepper kit is very popular.
Aerogarden also offers a germination guarantee. If any pods fail to germinate, just contact customer service and they’ll ship you a replacement.
You can also grow anything you’d like if you have your own seeds. You just need a growing medium (brown sponges or rock wool work great) and pod baskets to hold the seeds.
I purchased this Grow Your Own kit so that I could plant hot peppers and a variety of unique greens (tatsoi, baby bok choi and tennis ball romaine lettuce)
Read more: How to Use Your Own Seeds in the Aerogarden
ADVERTISEMENT
Aerogarden Farm XL Set Up
How to assemble the Aerogarden Farm:
1. Unbox Everything
The Farm unit arrived in a gigantic (and heavy) box!
I recommend assembling the unit on a table so that you don’t have to hunch over quite as much. Just put a towel down or something soft to prevent scratches.
ADVERTISEMENT
2. Start with the Top and Attach the Left Side
The instruction manual has you assemble the machine upside down, from top to bottom.
Start with the top and make sure the monitor screen is facing you.
Then attach the left side frame. Look for the L or R on the bottom black plastic of the side frames to identify which side is which.
Grab two screws and two washers, and secure the left side frame to the top. The metal holes don’t line up well, so I found this part a bit tricky.
I recommend screwing in the bolts half way – enough so the side frame is attached to the top, but loose enough to be able to wiggle.
ADVERTISEMENT
3. Secure the Left Side Underneath
Then secure the legs underneath in the storage compart. You’ll again need two screws and two washers.
Here I recommend removing the side flap so it doesn’t get in your way, and so you can see better. Just gently pull down to take it off.
ADVERTISEMENT
4. Repeat with the Right Side
Grab another two bolts and two washers and repeat the process for the other side, attaching the right frame to the top of the Aerogarden Farm.
Then grab two bolts and two washers to secure underneath, on the storage compartment.
ADVERTISEMENT
5. Attach the Base Bars
Now, flip the machine over so it’s right side up.
You’ll grab the two metal base bars and attach them to support the Farm model at the bottom. Again, I found this tricky.
You might need to loosen some (or all) of the 8 screws you assembled previously.
Gently wiggle the machine until you can fit the base bars in.. .then secure everything with four more bolts and washers.
ADVERTISEMENT
6. Plug in the Power Cords
Attach the power cords on the left and right frames to the top.
7. Move the Farm to Your Desired Spot
Now the frame of the machine is altogether, so move the Aerogarden to where you want it to permanently sit.
I recommend a spot relatively close to a sink or water access, to make it easier to fill and empty the Farm.
ADVERTISEMENT
8. Assemble the Grow Deck
Fit the grow deck on to the water reservoir.
Make sure the pump lines up and that the cords in the back lie in the little notch. Place it on the metal base bars.
9. Set Up the LED Light
Remove the four little rubber pins on the top of the LED light.
Underneath the top of the Aerogarden Farm, you’ll find little metal cords. Release them and fit them into the top of the LED light in the little holes. Put the rubber pins back in to securely hold the metal cords in place.
It’s ok if the LED light is slightly lopsided. It will kind of adjust and even out.
Plug in the LED light by attaching the power cord into the left side of the top.
ADVERTISEMENT
10. Attach the Trellis (optional)
The Farm models come with trellises so you can stake your taller vegetable plants.
This step is technically not needed right now, since your plants haven’t even germinated, but it’s easy to set up!
The trellises have metal clamps that stick to the side frames of the Aerogarden Farm. Then each smaller vertical cord has pins to clamp onto any section of the trellis.
ADVERTISEMENT
11. Plug in the Farm and Start Your Garden
You’re all set!
Power on the machine, walk through the setup instructions on the monitor and start planting.
One last tip: you don’t need to fill all the slots of the garden. Even though there are 12 (or 24) spaces in the Farm, larger vegetable plants like cherry tomatoes and peppers need a lot of room to thrive.
Try following this rough rule of thumb:
Aerogarden Plant Spacing Guide
| Herbs: | 1 plant per pod |
| Lettuces | 1 plant per pod |
| Peppers | 1 plant per 2-3 pods |
| Cherry Tomatoes | 1 plant per 3-4 pods |
The more room you give your plants, the more they’ll expand and grow to fill the space. So consider the yield of each plant rather than the total quantity of plants!
ADVERTISEMENT
Shop Aerogarden and Hydroponic Kits
ADVERTISEMENT
Read More: in our Indoor Hydroponics series:
Aerogarden
Is the Aerogarden Worth It? Harvest Review
How To Guides
How to Easily Clean & Sanitize the Aerogarden Between Plantings
How to Assemble the Aerogarden Farm XL *Tips + Tricks*
How to Grow ANYTHING in the Aerogarden!
